1. 各種アプリのインストールと設定
  2. Puppy Fossapup64 にはデフォルトで メール・テキストエディタ・ブラウザ・ftpツールなど最低限のアプリがデフォルトでインストールされている他、 MS-Office互換の LibreOfficeの簡単インストールメニューや、画像処理アプリ GIMPが QuickPetからインストールできるなど緊急時などの簡易的な利用には十分だ。
    しかし Windowsを置き換えて常用しようとすると効率などの点でどうしても追加のアプリやツールをインストールする必要が出てくる。以下、私の個人的な使い方でのニーズに基づいて追加インストールしたアプリや環境設定方法を紹介する。
    日本語対応 Puppyにはあらかじめいくつかの汎用アプリケーションが登録されているが、例えば画像処理の GIMPは高機能だが操作方法が独特で フォトショ系アプリに慣らされてしまった私には使い辛い。
    「それでも・・・」と思っては何度か挑戦したが、いつもチョコチョコッとしか触らないので、しばらくするとまた最初からやり直しでいつまでも慣れないで結局諦めた。
    Puppyで使えるような軽くて、操作性が PhotoShopなどメジャーなアプリに似ていて・・・という基準で探して、結局 かなり力不足感は否めないが Pintaというアプリに行き着いた。

    A. Pintaのインストール
    このアプリを Puppyで使えるようにするためには Puppy日本語フォーラムの タロ兵衛さんの書き込みからタロ兵衛さんがアップしてくださったPintaの実行イメージ から aspnetcore-runtime-7.0.16-linux-x64.img.tar.gz をダウンロードして解凍。
    Pinta-x86-64.AppImage を /mnt/home に移動して 実行権限を付与したら、ターミナルから下記を実行して /bin/ にシンボリックリンクを作成。
       # ln -s /mnt/home/Pinta-x86-64.AppImage /bin/pinta	
    これで ターミナルから pinta とうてば Pintaが起動する。
    スタートメニューに登録するには /usr/share/applications にある mtpaint.desktop を テキストとして開いて
    [Desktop Entry]
    Version=2.1
    Name=Pinta image editor
    GenericName=Pinta image editor
    Comment=画像ファイルの編集
    Type=Application
    Exec=pinta
    Icon=pinta.png
    Categories=RasterGraphics
    Keywords=graphics;editor
    MimeType=image/bmp;image/jpeg;image/jpg;image/png;image/tiff;image/ora;image/tga;
    などと修正して保存する。
    次に /usr/share/pixmaps に pinta のアイコン 
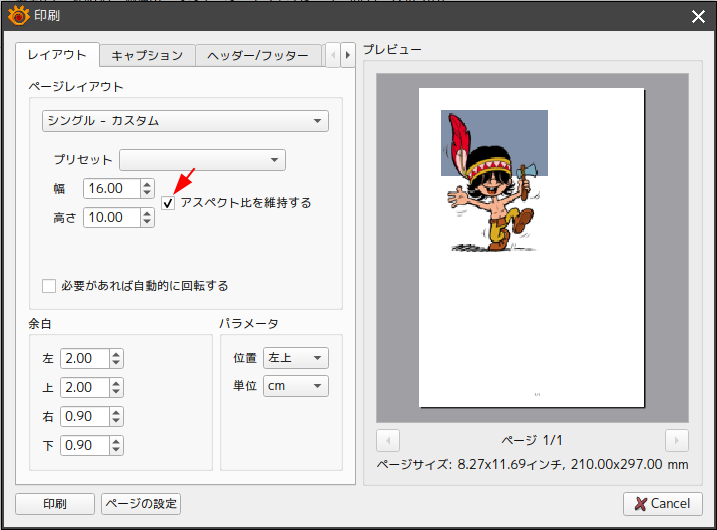
pinta.png を 48x36ピクセル程度で保存する。
    最後にターミナルから fixmenus を実行して 「メニュー」>「シャットダウン」>「Window Magager再起動」すると、メニューのグラフィックカテゴリに Pintaが表示されて、Pinta をクリックすると起動する。
    Pinta のマニュアル

    ただし Pintaには 印刷機能はついていない。
    画像印刷アプリ XnViewMP のフリーウェア版などを使う。
    インストール方法は PPMで "xmview" で検索して表示される "XnViewMP-0.96.5" をインストールすることで画像ファイルの印刷が可能になる。
    図-1
    XnViewで注意しないといけないのは、右画像のように 「アスペクト比を維持」にチェックを入れないと、縦・横の設定値(初期は縦横 10Cm)で印刷されてしまう。
  3. スクリーンショット取得
  4. こうしたページ作成に欠かせないスクリーンショットだが、 Puppy には標準で「グラフィック」>「スクリーンショット取得!」 で「Take a Shot」が起動する。 記録範囲は全画面/ウインドウ/選択領域 が選択可能で、画像の保存形式は PNG/JPG/BMP/TIF/GIF が選べる。マウスポインタを含めることも可能で遅延時間が設定できるのでマウスオン時などの画面記録をするのには都合がいい。
    また「マルチメディア」>「SimpleScreenRecorder」で動画記録可能だ。
    その他、アプリの Flameshotも便利。 起動すると目立たないが、デスクトップに小さな 赤いアイコンが表示されて、そのアイコンを右クリックして「Open Launcher」を選ぶと Flameshot のランチャーが表示されて「Take new screenshot」ボタンを押すと画面が暗転してカーソルで記録範囲を選択してキャプチャできる。遅延記録はできるがマウスポインタは記録できず、記録範囲はフルスクリーンか都度範囲選択かを選択する。(ウインドウ単位は選べない) 
    ただし、スクリーンショットを撮ったウインドウで矢印や文字入れなどの編集が可能だ。
    インストールは PPMで 「flemashot」と入力して検索すると flameshot_0.6.0+git20191001-2 がヒットするので、Do itでインストールする。インストールしたら ターミナルから 「flameshot」と打って起動する。
    「メニュー」>「デスクトップ」からも起動できるが、 /usr/share/aplications/flameshot.desktop を開いて Categories= の行を「 Categories=RasterGraphics」と修正すると、「メニュー」>「グラフィック」に移動する。
    図-2
    遅延起動は タスクバーのアイコンを右クリックして「ランチャー」を起動して実行する。
    図-3

  5. クラウドドライブアプリのインストール
  6. A. Mega Cloudデスクトップアプリのインストールと同期設定 https://mega.nz/ から デスクトップアプリ UBUNTU 20.04用 megasync-xUbuntu_20.04_amd64.dev をダウンロードして クリックしてインストール。更に PPMで「libmediainfo」を検索し「libmediainfo0v5_19.09+dfsg」もインストール。
    (必ずしも必要ではないが /usr/share/aplications/megasync.desktop を開いて、Categories=FileManager を修正。)
    図-4
    タスクバーの megasync のアイコンを右クリックして「設定」を開き、「同期」タブで同期するローカルのフォルダーとクラウドのフォルダーを指定して追加する。
    このとき、ローカルフォルダーは puppyをインストールしたパーティション(pupsaveと同じパーティション /mnt/home/ 配下) にフォルダーを作成しないと再起動したとき同期が失敗する。
    但し、Mega Cluodはフリーでも最大 20GBという容量が使えるので、これの同期フォルダーを/home 配下に配置すると Puppyの saveファイルサイズが巨大化して Puppyのメリットが失われてしまう。
    その場合、別ドライブ(例:sdx)に同期フォルダーを配置しておいてそのシンボリックリンクを /mnt 配下に作成し、起動時に sdxを自動でマウントするように以下のようなスクリプトを /root/startup に作成しておく。
    #!/bin/sh
    mkdir -p /mnt/sda1			# Mega_local のマウントポイントがなければ作成
    mount /dev/sda1 /mnt/sda1	# HDD(Windows の D:トライブ) を Mega_local 同期のためにマウントする
    if [ ! -e /mnt/Mega_local ]; then	# シンボリックリンクがなければ作成する
    	ln -s /mnt/sda1/Mega_local /mnt/Mega_local
    fi
    		

    B. rClone をインストールして Google-Drive をマウントする
    ##### rClone で Google Driveを登録する方法
    install ; PPM で rclone_1.50.2 (35MB) をインストール
    https://tunnelix.com/rclone-your-files-to-google-drive-on-rocky-linux/
    https://rclone.org/drive/#making-your-own-client-id
    https://ucr-research-computing.github.io/Knowledge_Base/how_to_mount_google_drive.html
    ターミナルから以下を実行する
    # rclone config
    
    2024/05/27 17:41:49 NOTICE: Config file "/root/.config/rclone/rclone.conf" not found - using defaults
    No remotes found - make a new one
    n) New remote
    s) Set configuration password
    q) Quit config
    n/s/q> n
    name> G-drive 
    Type of storage to configure.
    Enter a string value. Press Enter for the default ("").
    Choose a number from below, or type in your own value
     1 / 1Fichier
       \ "fichier"
     2 / Alias for an existing remote
       \ "alias"
      |
      |
    11 / FTP Connection
       \ "ftp"
    12 / Google Cloud Storage (this is not Google Drive)
       \ "google cloud storage"
    13 / Google Drive
       \ "drive"
    14 / Google Photos
       \ "google photos"
      |
      |
    32 / premiumize.me
       \ "premiumizeme"
    Storage> 13					# Google Drive を選択
     See help for drive backend at: https://rclone.org/drive/ 
    
    Google Application Client Id
    Setting your own is recommended.
    See https://rclone.org/drive/#making-your-own-client-id for how to create your own.
    If you leave this blank, it will use an internal key which is low performance.
    Enter a string value. Press Enter for the default ("").
    client_id>						# そのまま Enter
    Google Application Client Secret
    Setting your own is recommended.
    Enter a string value. Press Enter for the default ("").
    client_secret> 					# そのまま Enter
    Scope that rclone should use when requesting access from drive.
    Enter a string value. Press Enter for the default ("").
    Choose a number from below, or type in your own value
     1 / Full access all files, excluding Application Data Folder.
       \ "drive"
     2 / Read-only access to file metadata and file contents.
       \ "drive.readonly"
       / Access to files created by rclone only.
     3 | These are visible in the drive website.
       | File authorization is revoked when the user deauthorizes the app.
       \ "drive.file"
       / Allows read and write access to the Application Data folder.
     4 | This is not visible in the drive website.
       \ "drive.appfolder"
       / Allows read-only access to file metadata but
     5 | does not allow any access to read or download file content.
       \ "drive.metadata.readonly"
    scope> 1				# Full access all files を選択
    ID of the root folder
    Leave blank normally.
    
    Fill in to access "Computers" folders (see docs), or for rclone to use
    a non root folder as its starting point.
    
    Note that if this is blank, the first time rclone runs it will fill it
    in with the ID of the root folder.
    
    Enter a string value. Press Enter for the default ("").
    root_folder_id> 
    
    ルートフォルダIDの特定は非常に簡単です。
    ドライブ.google.comに移動します。そこにフォルダをドラッグアンドドロップします。
    フォルダに入り、次のようなURLを確認します。
    __https://drive.google.com/drive/folders/xxxxxxxxxyyyyyyyyyyzzzzzzz%E2%80%8B%E2%80%8B%E2%80%8B%E2%80%8B%E2%80%8B%E2%80%8B%E2%80%8B%E2%80%8B%E2%80%8B%E2%80%8B%E2%80%8B%E2%80%8B__
    数字とアルファベットの組み合わせはルート フォルダーの最後にあります。
    
    Service Account Credentials JSON file path 
    Leave blank normally.
    Needed only if you want use SA instead of interactive login.
    Enter a string value. Press Enter for the default ("").
    service_account_file> 
    Edit advanced config? (y/n)
    y) Yes
    n) No
    y/n> n
    Remote config
    Use auto config?
     * Say Y if not sure
     * Say N if you are working on a remote or headless machine
    y) Yes
    n) No
    y/n> y
    If your browser doesn't open automatically go to the following link: http://127.0.0.1:53682/auth?state=FxbwSOFSg8H71HQVFTr6Ag
    Log in and authorize rclone for access
    Waiting for code...						# ブラウザで上記 http://127.0.0.1:53682/auth?state=Fxb%E3%83%BB%E3%83%BB%E3%83%BB%E3%81%AB%E3%82%A2%E3%82%AF%E3%82%BB%E3%82%B9%E3%81%97%E3%81%A6rClone のアクセスを Googleに許可すると次に進む
    Got code
    Configure this as a team drive?
    y) Yes
    n) No
    y/n> y
    Fetching team drive list...
    No team drives found in your account--------------------
    [G-drive]
    scope = drive
    token = {"access_token":"ya29.a0AXooCguPcDQpiz3C8Yj5w9h7Ni8C8gN-pFzKTWVGTlMRG3-uAqb_xvXkD4BH_2uowP4CLbFKs8sXdZ2BeM2RJpnk-n6lvxSIw6QuCs98OWRPfGVxJ6aXNFtQEncj0sSAXd8CeTszpTRh0UX2Ia0Fij6DDreaRG3-sqyIaCgYKAfMSARASFQHGX2MiZvwn87gTppvcEd8uwdhhWg0171","token_type":"Bearer","refresh_token":"1//0eKXfFZS4Cn32CgYIARAAGA4SNwF-L9IrTR1D9pPryt95-R8eDhbzNk9-owBiEKJyK-lKx9yjCPsdcnvFR-7XjfJ0KeL0fqKfC0w","expiry":"2024-05-27T19:27:55.6713377+09:00"}
    team_drive = 
    --------------------
    y) Yes this is OK
    e) Edit this remote
    d) Delete this remote
    y/e/d>  y
    Current remotes:
    
    Name                 Type
    
    ### =
    G-drive              drive
    
    e) Edit existing remote
    n) New remote
    d) Delete remote
    r) Rename remote
    c) Copy remote
    s) Set configuration password
    q) Quit config
    e/n/d/r/c/s/q>>  q
    		##### 以上で rclone の同期設定は完了


  7. 


Access Counter:  総アクセス数